RecyclerView渲染流程
RecyclerView继承自ViewGroup,其展示流程入口就还得是onMeasure、onLayout方法,下面将从这两个方法作为入口,探究RecyclerView展示的原理。
onMeasure实现原理 onMeasure方法的代码很长,这里放上一段精简过的伪代码:
@Override protected void onMeasure (int widthSpec, int heightSpec) if (mLayout == null ) { defaultOnMeasure(widthSpec, heightSpec); return ; } if (mLayout.isAutoMeasureEnabled()) { ··· mLayout.onMeasure(mRecycler, mState, widthSpec, heightSpec); ··· if (skipMeasure || mAdapter == null ) { return ; } if (mState.mLayoutStep == State.STEP_START) { dispatchLayoutStep1(); } ... dispatchLayoutStep2(); mLayout.setMeasuredDimensionFromChildren(widthSpec, heightSpec); if (mLayout.shouldMeasureTwice()) { ... dispatchLayoutStep2(); mLayout.setMeasuredDimensionFromChildren(widthSpec, heightSpec); } } else { if (mHasFixedSize) { mLayout.onMeasure(mRecycler, mState, widthSpec, heightSpec); return ; } if (mAdapterUpdateDuringMeasure) { ··· } else if (mState.mRunPredictiveAnimations) { setMeasuredDimension(getMeasuredWidth(), getMeasuredHeight()); return ; } ··· mLayout.onMeasure(mRecycler, mState, widthSpec, heightSpec); ··· } }
这里的mLayout对象是LayoutManager,measure过程主要分为了这样几种情况:
1、LayoutManager为空,使用默认测量方案通过defaultOnMeasure方法完成
2、有LayoutManager,开启了自动测量。
这种情况是最复杂的,需要根据子View的布局来调整自身的大小。需要知道子View的大小和布局。所以RecyclerView将布局的过程提前到这里来进行了
3、有LayoutManager,而且关闭了自动测量功能。
关闭测量的情况下不需要考虑子View的大小和布局。直接按照正常的流程来进行测量即可。如果直接已经设置了固定的宽高,那么直接使用固定值即可。如果没有设置固定宽高,那么就按照正常的控件一样,根据父级的要求与自身的属性进行测量
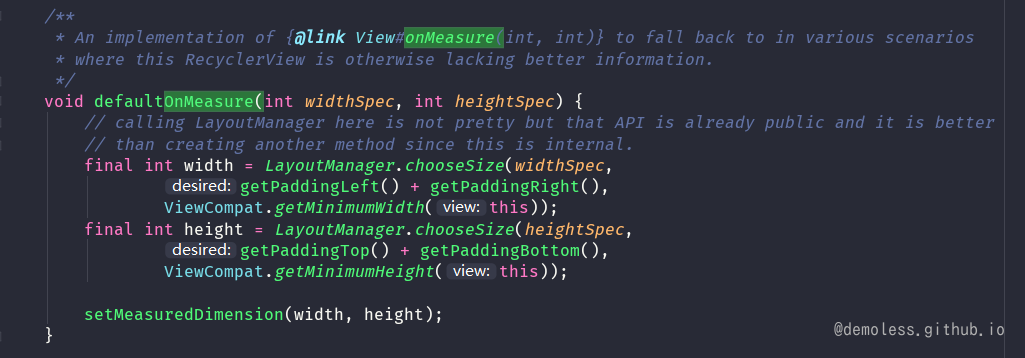
defaultOnMeasure实现
chooseSize方法中根据measureMode来确认RecyclerView的宽高,然后调用setMeasuredDimension方法设置测量的宽高。这里并没有对子View进行measure,也就是说在LayoutManager为空的情况下,测量的宽高是不含item的,显示出的效果就是空白,这也能很好的解释当你忘记调用setLayoutManager方法的时候,并不能符合预期的展示而是一片空白。
LayoutManager自动测量 自动测量的原理如下:
当RecyclerView的宽高都为EXACTLY时,可以直接设置对应的宽高,然后返回,结束测量。如果宽高的测量规则不是EXACTLY的,则会在onMeasure()中开始布局的处理,这里首先要介绍一个很重要的类:RecyclerView.State ,这个类封装了当前RecyclerView的有用信息。State的一个变量mLayoutStep表示了RecyclerView当前的布局状态,包括STEP_START、STEP_LAYOUT 、 STEP_ANIMATIONS三个,而RecyclerView的布局过程也分为三步,其中,STEP_START表示即将开始布局,需要调用dispatchLayoutStep1来执行第一步布局,接下来,布局状态变为STEP_LAYOUT,表示接下来需要调用dispatchLayoutStep2里进行第二步布局,同理,第二步布局后状态变为STEP_ANIMATIONS,需要执行第三步布局dispatchLayoutStep3。
这三个步骤的工作也各不相同,step1负责记录状态,step2负责布局,step3则与step1进行比较,根据变化来触发动画.在开启自动测量的情况下如果没有设置固定宽高,那么会执行setp1和step2。在step2执行完后就可以调用 setMeasuredDimensionFromChildren 方法,根据子类的测量布局结果来设置自身的大小
先不进行分析step1,step2和step3的具体功能。直接把 onLayout 的代码也贴出来,看一下这3步是如何保证都能够执行的
@Override protected void onLayout (boolean changed, int l, int t, int r, int b) dispatchLayout(); } void dispatchLayout () if (mAdapter == null ) { Log.e(TAG, "No adapter attached; skipping layout" ); return ; } if (mLayout == null ) { Log.e(TAG, "No layout manager attached; skipping layout" ); return ; } mState.mIsMeasuring = false ; if (mState.mLayoutStep == State.STEP_START) { dispatchLayoutStep1(); mLayout.setExactMeasureSpecsFrom(this ); dispatchLayoutStep2(); } else if (mAdapterHelper.hasUpdates() || mLayout.getWidth() != getWidth()|| mLayout.getHeight() != getHeight()) { mLayout.setExactMeasureSpecsFrom(this ); dispatchLayoutStep2(); } else { mLayout.setExactMeasureSpecsFrom(this ); } dispatchLayoutStep3(); }
可以看到,其实在 onLayout 阶段会根据 onMeasure 阶段3个步骤执行到了哪个,然后会在 onLayout 中把剩下的步骤执行.在这3个步骤中,step2就是执行了子View的测量布局的一步,也是最重要的一环,所以我们将关注的重点放在这个函数
private void dispatchLayoutStep2 () eatRequestLayout(); ... mState.mInPreLayout = false ; mLayout.onLayoutChildren(mRecycler, mState); ... resumeRequestLayout(false ); }
这里调用LayoutManager的 onLayoutChildren 方法,将对于子View的测量和布局工作交给了LayoutManager。而且我们在自定义LayoutManager的时候也必须要重写这个方法来描述我们的布局错略。这里我们分析最经常使用的 LinearLayoutManager
public void onLayoutChildren (RecyclerView.Recycler recycler, RecyclerView.State state)
LinearLayoutManager 中的布局策略主要是以下几个方面:
通过子控件和其他的变量信息。找到一个锚点和锚点项的位置。
从锚点的位置开始,往上,填充布局子View,直到填满区域
从锚点的位置开始,往下,填充布局子View,直到填满区域
滚动以满足需求,如堆栈从底部
这里有个比较关键的词,就是 锚点(AnchorInfo) ,其实 LinearLayoutManager的布局并不是从上往下一个个进行的。而是很可能从整个布局的中间某个点开始的,然后朝一个方向一个个填充,填满可见区域后,朝另一个方向进行填充。至于先朝哪个方向填充,是根据具体的变量来确定的
锚点的选择 AnchorInfo 类需要能够有效的描述一个具体的位置信息,我们首先类内部的几个重要的成员变量
class AnchorInfo int mPosition; int mCoordinate; boolean mLayoutFromEnd; boolean mValid;
通过 AnchorInfo 就可以准确的定位当前的位置信息了,现在再看看onLayoutChildren中具体的处理:
public void onLayoutChildren (RecyclerView.Recycler recycler, RecyclerView.State state) ... ensureLayoutState(); mLayoutState.mRecycle = false ; resolveShouldLayoutReverse(); if (!mAnchorInfo.mValid || mPendingScrollPosition != NO_POSITION || mPendingSavedState != null ) { mAnchorInfo.reset(); mAnchorInfo.mLayoutFromEnd = mShouldReverseLayout ^ mStackFromEnd; updateAnchorInfoForLayout(recycler, state, mAnchorInfo); mAnchorInfo.mValid = true ; } }
在需要确定锚点的时候,会先将锚点进行初始化,然后通过 updateAnchorInfoForLayout 方法来确定锚点的信息
private void updateAnchorInfoForLayout (RecyclerView.Recycler recycler, RecyclerView.State state, AnchorInfo anchorInfo) if (updateAnchorFromPendingData(state, anchorInfo)) { return ; } if (updateAnchorFromChildren(recycler, state, anchorInfo)) { return ; } anchorInfo.assignCoordinateFromPadding(); anchorInfo.mPosition = mStackFromEnd ? state.getItemCount() - 1 : 0 ; }
锚点的确定方案主要有3个:
从挂起的数据获取锚点信息。一般不会执行。
从子View来确定锚点信息。比如说notifyDataSetChanged方法的时候,屏幕上原来是有View的,那么就会通过这种方式获取
如果上面两种方法都无法确定,其实就是没有子View让我们作为参考。比如说第一次加载数据的时候,RecyclerView一片空白则直接使用0位置的View作为锚点参考position。
那么当有子View的时候,我们通过 updateAnchorFromChildren 方法来确定锚点位置
private boolean updateAnchorFromChildren (RecyclerView.Recycler recycler, RecyclerView.State state, AnchorInfo anchorInfo) if (getChildCount() == 0 ) { return false ; } final View focused = getFocusedChild(); if (focused != null && anchorInfo.isViewValidAsAnchor(focused, state)) { anchorInfo.assignFromViewAndKeepVisibleRect(focused); return true ; } if (mLastStackFromEnd != mStackFromEnd) { return false ; } View referenceChild = anchorInfo.mLayoutFromEnd ? findReferenceChildClosestToEnd(recycler, state) : findReferenceChildClosestToStart(recycler, state); if (referenceChild != null ) { anchorInfo.assignFromView(referenceChild); ... return true ; } return false ; }
通过子View确定锚点坐标也是进行了3种情况的处理
没有数据,直接返回获取失败
如果某个子View持有焦点,那么直接把持有焦点的子View作为锚点参考点
没有子View持有焦点,一般会选择最上(或者最下面)的子View作为锚点参考点
一般情况下,都会使用第三种方案来确定锚点,所以我们这里也主要关注一下这里的方法。按照我们默认的变量信息,这里会通过 findReferenceChildClosestToStart 方法获取可见区域中的第一个子View作为锚点的参考View。然后调用 assignFromView 方法来确定锚点的几个属性值
public void assignFromView (View child) if (mLayoutFromEnd) { mCoordinate = mOrientationHelper.getDecoratedEnd(child) + mOrientationHelper.getTotalSpaceChange(); } else { mCoordinate = mOrientationHelper.getDecoratedStart(child); } mPosition = getPosition(child); }
mPostion这个变量很好理解,就是子View的位置值,那么 mCoordinate 是个什么,看getDecoratedStart 是怎么处理的就知道了
if (mOrientationHelper == null ) { mOrientationHelper = OrientationHelper.createOrientationHelper(this , mOrientation); } public static OrientationHelper createVerticalHelper (RecyclerView.LayoutManager layoutManager) return new OrientationHelper(layoutManager) { @Override public int getDecoratedStart (View view) final RecyclerView.LayoutParams params = (RecyclerView.LayoutParams)view.getLayoutParams(); return mLayoutManager.getDecoratedTop(view) - params.topMargin; } } }
布局的填充 回到主线 onLayoutChildren 函数。当我们的锚点信息确认以后,剩下的就是从这个位置开始进行布局的填充
if (mAnchorInfo.mLayoutFromEnd) { updateLayoutStateToFillStart(mAnchorInfo); mLayoutState.mExtra = extraForStart; fill(recycler, mLayoutState, state, false ); startOffset = mLayoutState.mOffset; final int firstElement = mLayoutState.mCurrentPosition; if (mLayoutState.mAvailable > 0 ) { extraForEnd += mLayoutState.mAvailable; } updateLayoutStateToFillEnd(mAnchorInfo); mLayoutState.mExtra = extraForEnd; mLayoutState.mCurrentPosition += mLayoutState.mItemDirection; fill(recycler, mLayoutState, state, false ); endOffset = mLayoutState.mOffset; if (mLayoutState.mAvailable > 0 ) { extraForStart = mLayoutState.mAvailable; updateLayoutStateToFillStart(firstElement, startOffset); mLayoutState.mExtra = extraForStart; fill(recycler, mLayoutState, state, false ); startOffset = mLayoutState.mOffset; } } else { updateLayoutStateToFillEnd(mAnchorInfo); mLayoutState.mExtra = extraForEnd; fill(recycler, mLayoutState, state, false ); endOffset = mLayoutState.mOffset; final int lastElement = mLayoutState.mCurrentPosition; if (mLayoutState.mAvailable > 0 ) { extraForStart += mLayoutState.mAvailable; } updateLayoutStateToFillStart(mAnchorInfo); mLayoutState.mExtra = extraForStart; mLayoutState.mCurrentPosition += mLayoutState.mItemDirection; fill(recycler, mLayoutState, state, false ); startOffset = mLayoutState.mOffset; if (mLayoutState.mAvailable > 0 ) { extraForEnd = mLayoutState.mAvailable; updateLayoutStateToFillEnd(lastElement, endOffset); mLayoutState.mExtra = extraForEnd; fill(recycler, mLayoutState, state, false ); endOffset = mLayoutState.mOffset; } }
可以看到,根据不同的绘制方向,这里面做了不同的处理,只是填充的方向相反而已,具体的步骤是相似的。都是从锚点开始往一个方向进行View的填充,填充满以后再朝另一个方向填充。填充子View使用的是 fill() 方法
int fill (RecyclerView.Recycler recycler, LayoutState layoutState, RecyclerView.State state, boolean stopOnFocusable) final int start = layoutState.mAvailable; if (layoutState.mScrollingOffset != LayoutState.SCROLLING_OFFSET_NaN) { if (layoutState.mAvailable < 0 ) { layoutState.mScrollingOffset += layoutState.mAvailable; } recycleByLayoutState(recycler, layoutState); } int remainingSpace = layoutState.mAvailable + layoutState.mExtra; LayoutChunkResult layoutChunkResult = mLayoutChunkResult; while ((layoutState.mInfinite || remainingSpace > 0 ) && layoutState.hasMore(state)) { layoutChunkResult.resetInternal(); layoutChunk(recycler, state, layoutState, layoutChunkResult); if (layoutChunkResult.mFinished) { break ; } layoutState.mOffset += layoutChunkResult.mConsumed * layoutState.mLayoutDirection; if (!layoutChunkResult.mIgnoreConsumed || mLayoutState.mScrapList != null || !state.isPreLayout()) { layoutState.mAvailable -= layoutChunkResult.mConsumed; remainingSpace -= layoutChunkResult.mConsumed; } ... } return start - layoutState.mAvailable; }
在 fill 方法中,会判断当前的是否还有剩余区域可以进行子View的填充。如果没有剩余区域或者没有子View,那么就返回。否则就通过 layoutChunk 来进行填充工作,填充完毕以后更新当前的可用区域,然后依次遍历循环,直到不满足条件为止
循环中的填充是通过 layoutChunk 来实现的
void layoutChunk (RecyclerView.Recycler recycler, RecyclerView.State state,LayoutState layoutState, LayoutChunkResult result) View view = layoutState.next(recycler); if (view == null ) { result.mFinished = true ; return ; } LayoutParams params = (LayoutParams) view.getLayoutParams(); if (layoutState.mScrapList == null ) { if (mShouldReverseLayout == (layoutState.mLayoutDirection == LayoutState.LAYOUT_START)) { addView(view); } else { addView(view, 0 ); } } else { if (mShouldReverseLayout == (layoutState.mLayoutDirection == LayoutState.LAYOUT_START)) { addDisappearingView(view); } else { addDisappearingView(view, 0 ); } } measureChildWithMargins(view, 0 , 0 ); result.mConsumed = mOrientationHelper.getDecoratedMeasurement(view); int left, top, right, bottom; ... layoutDecoratedWithMargins(view, left, top, right, bottom); if (params.isItemRemoved() || params.isItemChanged()) { result.mIgnoreConsumed = true ; } result.mFocusable = view.isFocusable(); }
这里主要做了5个处理:
通过 layoutState 获取要展示的View
通过 addView 方法将子View添加到布局中
调用 measureChildWithMargins 方法测量子View
调用 layoutDecoratedWithMargins 方法布局子View
根据处理的结果,填充LayoutChunkResult的相关信息,以便返回之后,能够进行数据的计算
如果只是考虑第一次数据加载,那么到目前为止,我们的整个页面通过两次 fill 就能够将整个屏幕填充完毕了